Rechampir brushes – the paintbrush for all those difficult to reach areas Some background information……
How To Cut In Paint Without Tape

How to cut in paint without tape
What separates the contractor from the DIY enthusiast! We believe that cutting in is an essential skill for any contractor as it can save huge amounts of time, and some cost, by eliminating the need for masking tape. But the skill of being able to cut in paint without tape, whilst being one of the most important factors differentiating the amateur DIY enthusiast and the true professional when it comes to using a paint brush, depends hugely on the quality of the brush.
As cutting in is used typically when it comes to the divide between wall and ceiling (and differing colors), window frames and glass, or where the wall joins with door frames and base boards, brushes need to be not only well filled but that well filled filament has to have a good percentage “tops” – the amount of filament that is full length ( ie to the top) of the brush head. Furthermore, even though the brush head is fanned when cutting in, it is important that it has a “memory” which brings it back to its original pointed shape to ensure accuracy after the fanning process. That is why we shape our brush heads and steam them before packing. The steaming process will give the filament this memory and the shape will be retained for the lifetime of the brush.
Some other points as we see it;
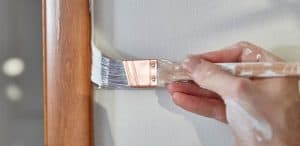
In general, the principle behind cutting in is to load the brush well and lay off some excess before moving it parallel to the edge to be painted. The filaments are then pressed causing the brush head to fan out or “bloom”. The brush is then brought into line with the edge of the area to be painted and a long stroke is made.
Differing amounts of accuracy are required for different painting areas and surfaces and the amount of pressure applied make the brush bloom will vary according to the precision required. Examples of areas where the cutting in technique is used are; walls to ceilings, light switches, window frames, and walls to baseboards. For high accuracy, creating an oval shape in the brush head rather than fanning out is preferential.
It is also important when working with fast drying acrylic paints in hotter temperatures to keep an eye on the filaments and ensure you are keeping a wet edge to the brush so that the filament does not dry out and cause paint tramlines on the surface.
In order to use this technique, a good quality brush is a must. They need to be well filled and with a percentage of “tops” (the amount of filaments that reach within 7mm of the flagged ends of the brush head). Whilst a good brush will have a tapering mixture of filaments, these should not start more than 50% below the tips and the tapering, or canting, needs to be gradual rather than stepped.
A poor quality brush will not only have stepped layers but can also have very short filaments, even within the first 10mm out of the ferrule. This serves no purpose at all other than to save cost and leaves the filament at the top empty giving ragged painting results.

