Rechampir brushes – the paintbrush for all those difficult to reach areas Some background information……
How To Prepare A Wall For Painting

How to prepare a wall for painting:
For the DIY enthusiast:
We spend a lot of money on top quality paint with luxurious finishes for paint projects in our homes, but all of that can go to waste if we do not remember the golden rule for painting: to achieve an amazing finish you need to properly prepare your surface first. In this post, we’ll discuss how to prepare a wall for painting.
Besides getting a clean, professional looking paint job there are many advantages in preparing surfaces for paint. A few include:
- Paint preparation saves you time and money as you will avoid trying to cover patches and bumps with excessive layers of paint.
- You will also prevent repainting the wall after a few months due to the paint beginning to lift because it did not properly adhere to the surface.
The following tips will help you prepare your surface for paint:
- Thoroughly clean your surface with sugar soap. Please take care to read the instructions on how to use and dilute this solvent as well as not letting it drip down your surface onto carpets or floors. Sugar soap will remove any unseen oils and stubborn dirt to ensure your paint adheres perfectly. Once your surface is clean please inspect for any damp spots or where paint is lifting away from the wall. If you notice this on your surface you will need to sort the source of the problem by waterproofing your surface to prevent dampness from seeping between your paint and surface.
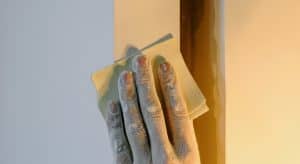
- If your surface has cracks, bumps or holes you will need to fill them with crack filler. Remove any debris and dust from holes or cracks, dampen the area with a cloth before applying your crack filler with a putty knife. Scrape off any excess filler and allow to dry. Once it has dried completely you can lightly sand the filler with sandpaper. It is advisable to sandpaper the entire surface to remove unseen bumps. Be sure to clean your surface of all dust at this point.
- Priming your surface will prevent the crack filler from showing through your paint. No matter how light or dark your paint is your crack filler will make itself visible after your paint dries. Invest in a good primer to show off your expensive new paint.
These tips also apply when you are touching up a wall or preparing to paint over stains.
We hope these points will help you on your next paint job and have a look at our other blogs for more painting related tips and tricks.
Happy painting.

